Deploying your infrastructure with Scalr and GitHub Actions
A tutorial explaining how to use GitHub Actions and Scalr together

This post is part of a series on CI/CD and GitOps for Terraform & OpenTofu.
In this post, we will discuss how to deploy your infrastructure with Terraform using Scalr and GitHub Actions. Scalr will be used as the backend for our Terraform state and GitHub Actions will act as the orchestrator to execute our Terraform runs.
If you're new to Scalr or would like to learn more I would recommend reading the Introduction and Getting Started pages as they provide a good level of detail to get you started with Scalr. For this post it assumes that you have a Scalr Organization and Environment setup and ready to go!
Setting up Scalr
First off, we need to set up a few things within Scalr: Service Account, Token, and Workspace. With these three things we will be able to connect up to GitHub and start running some Terraform.
- From the Scalr Environment dashboard we are going to be clicking on Create workspace.
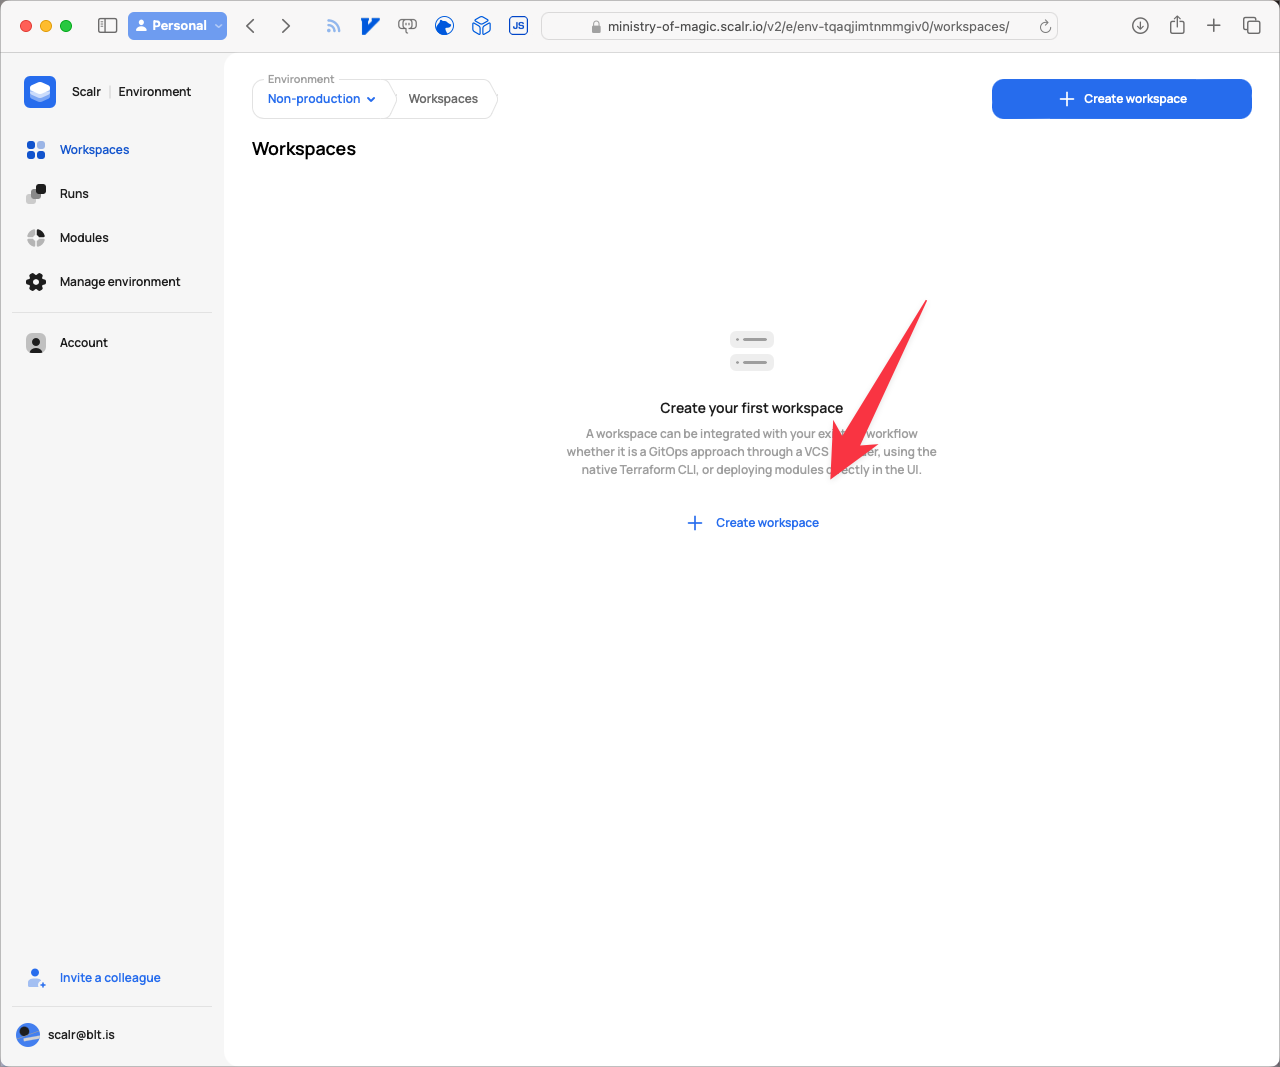
Empty State of the Workspace Dashboard in Scalr
- Give the workspace a Name that makes sense for your situation, and ensure you select CLI as the Source as we will be using GitHub Actions as our orchestrator rather than Scalr itself. Finally click on Create workspace.
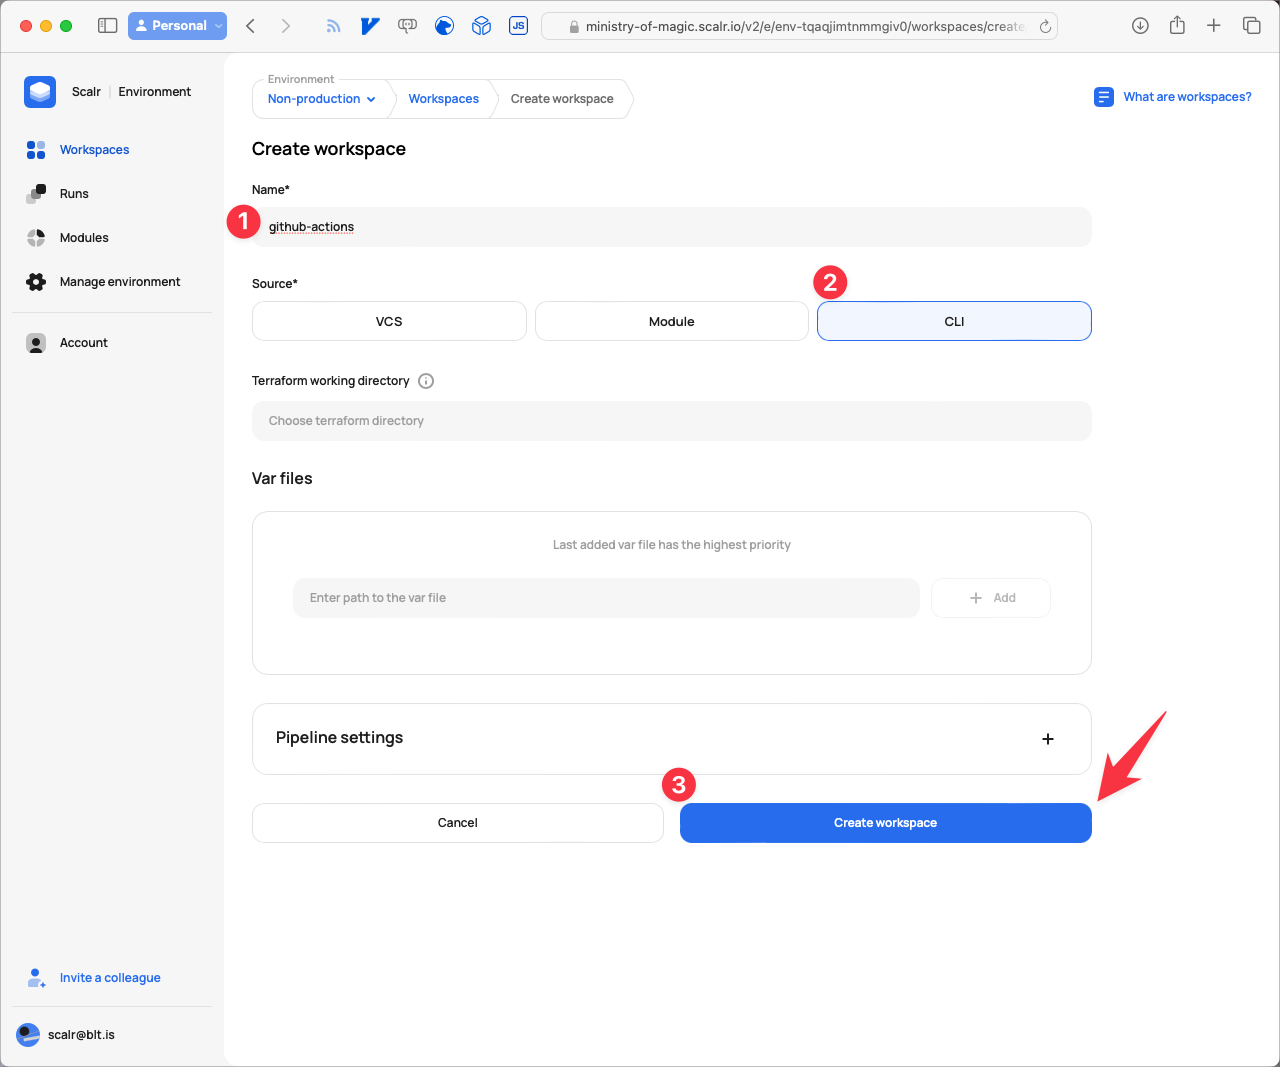
Creating a CLI based workspace
- The next step is going to be setting up a Service Account for GitHub to authenticate with. Click on Account.
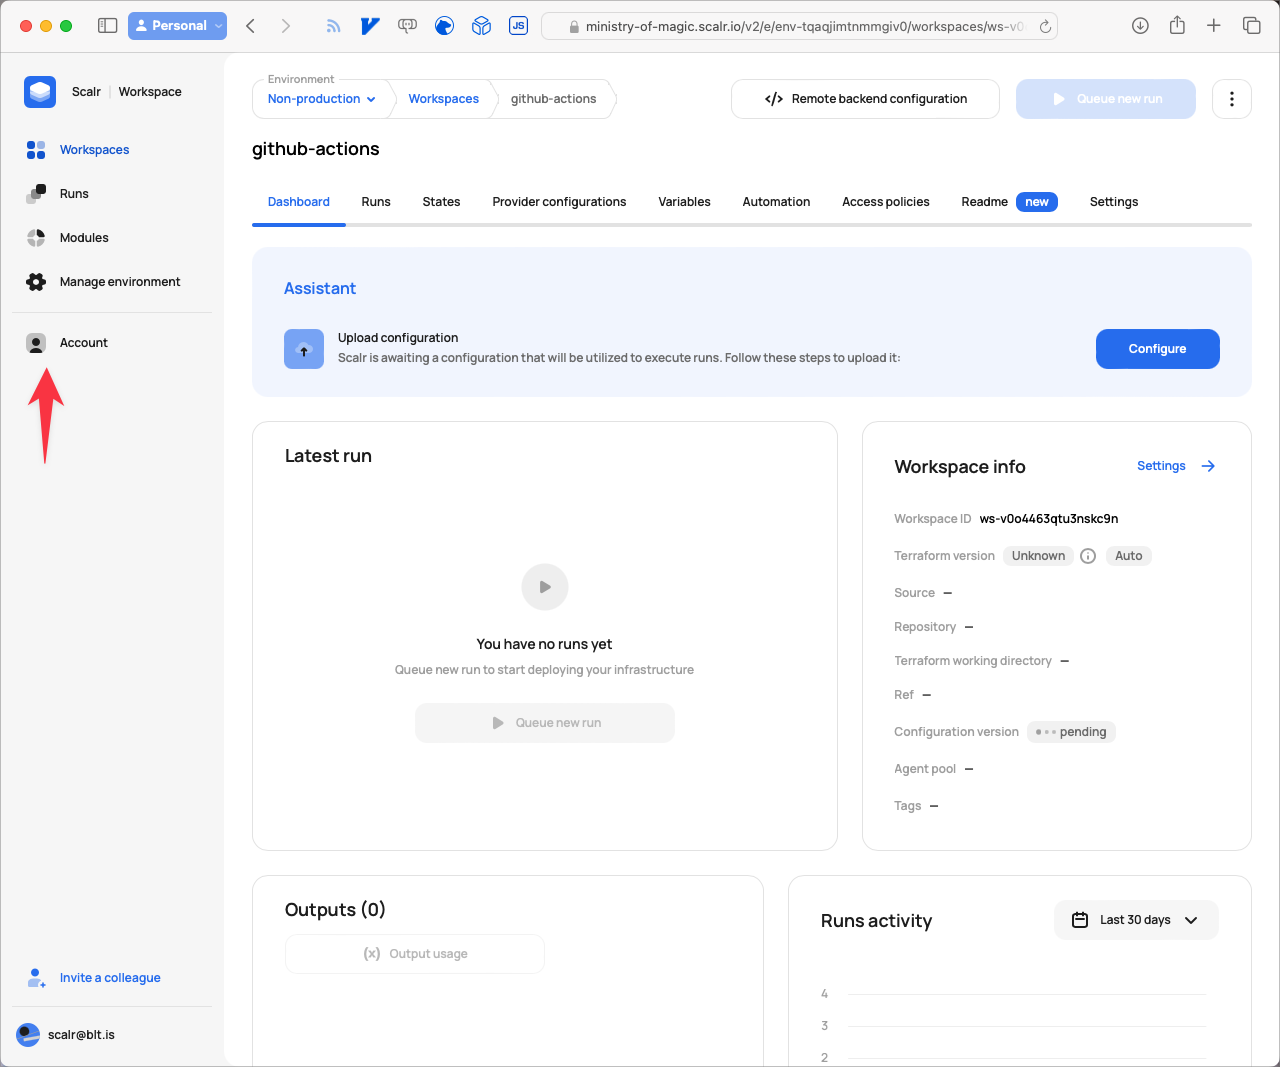
Navigating to Account
- Next click on IAM.
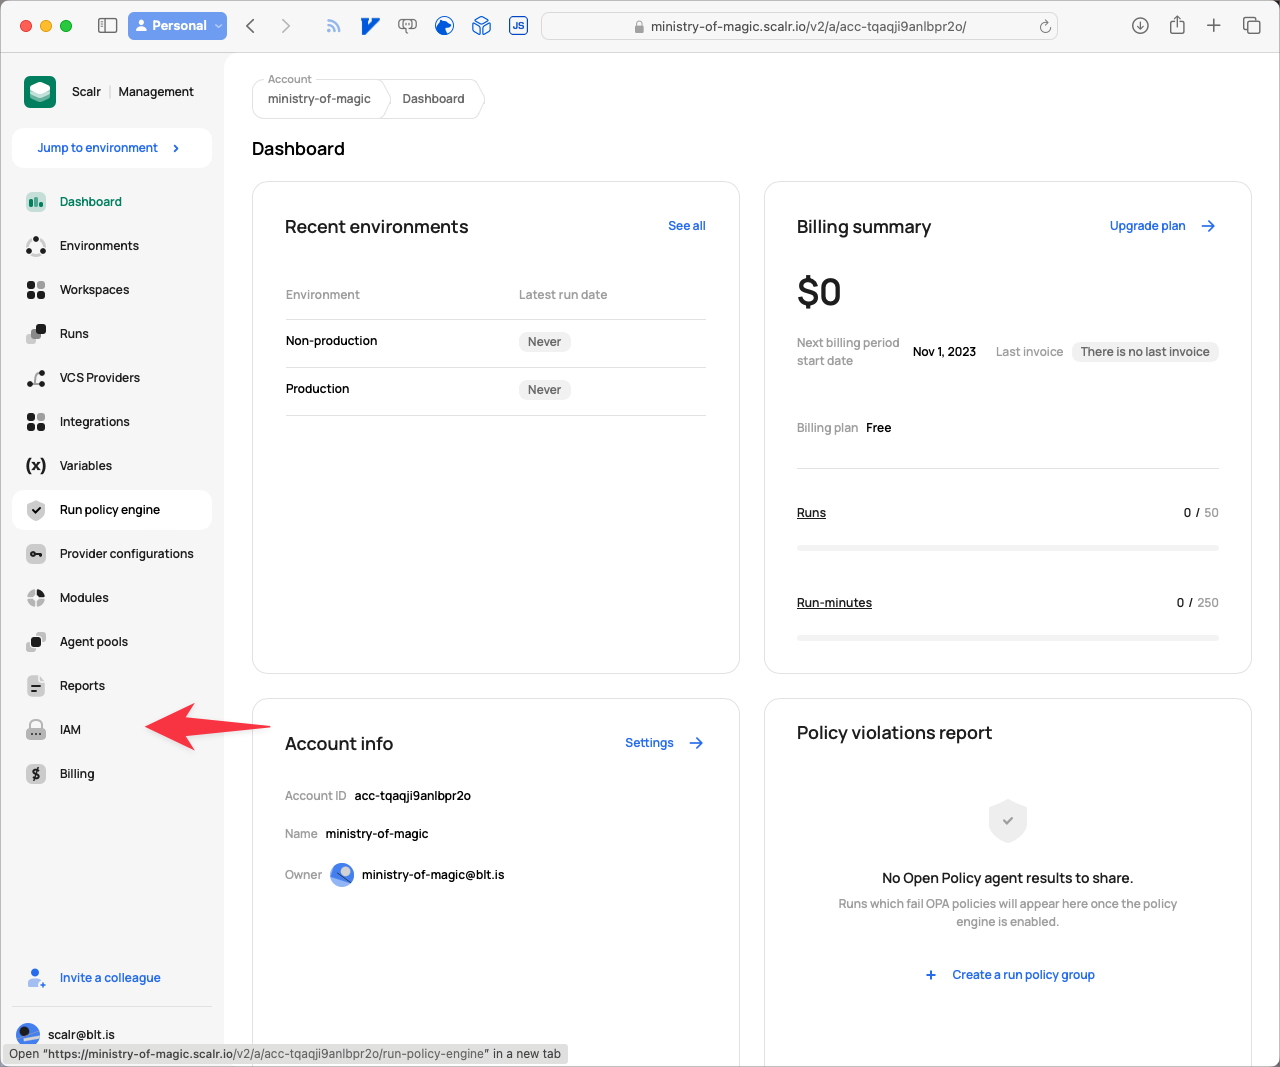
Navigate to IAM
- From the IAM page click on Service accounts.
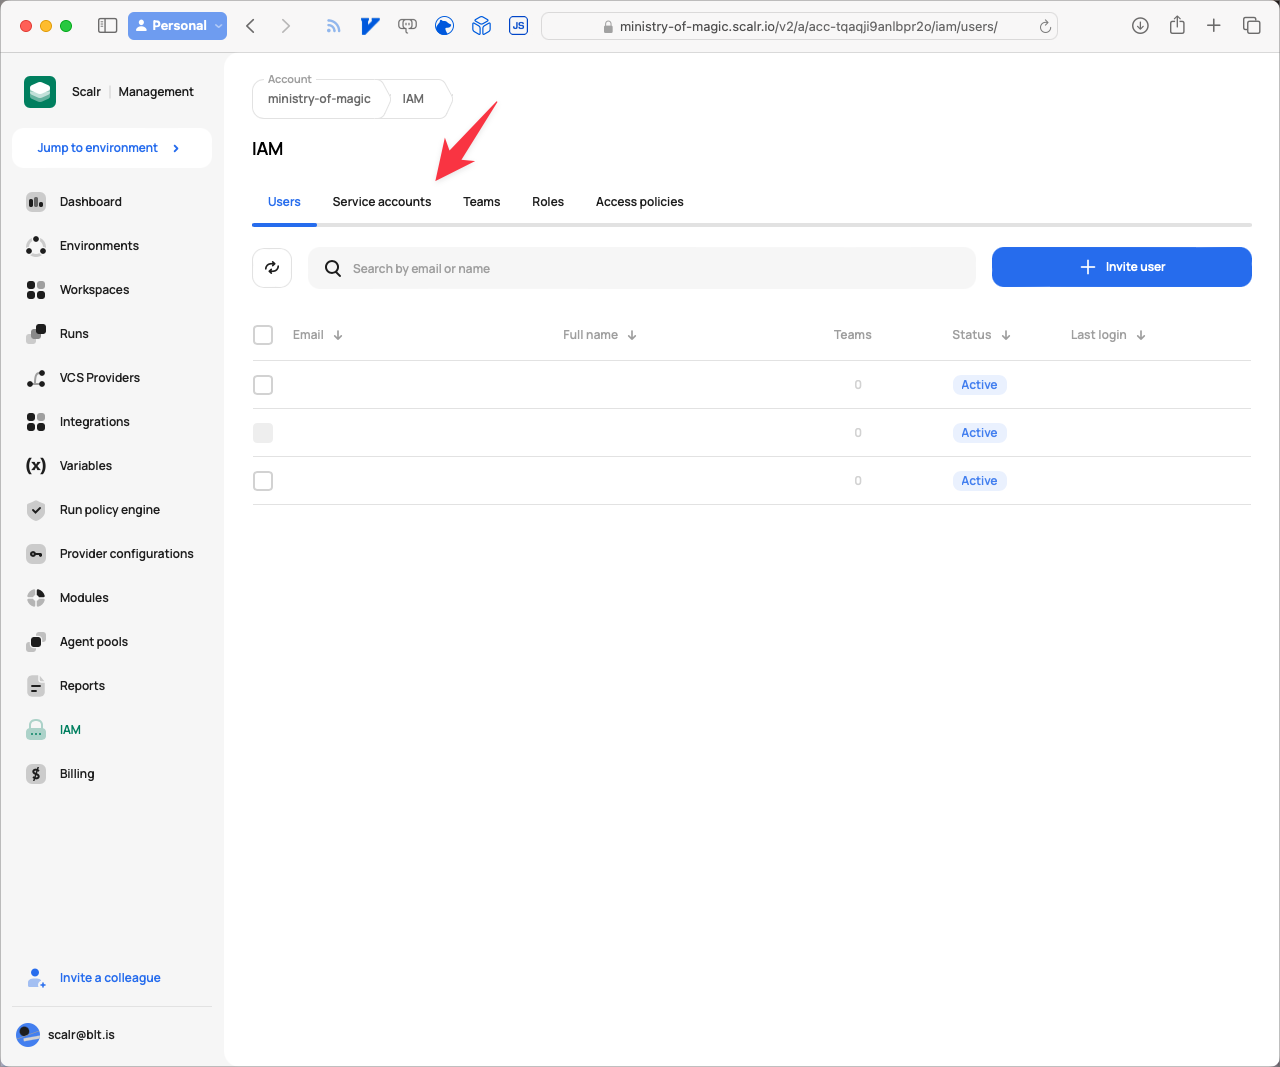
Navigating to the Service Accounts tab
- Click on New service account.
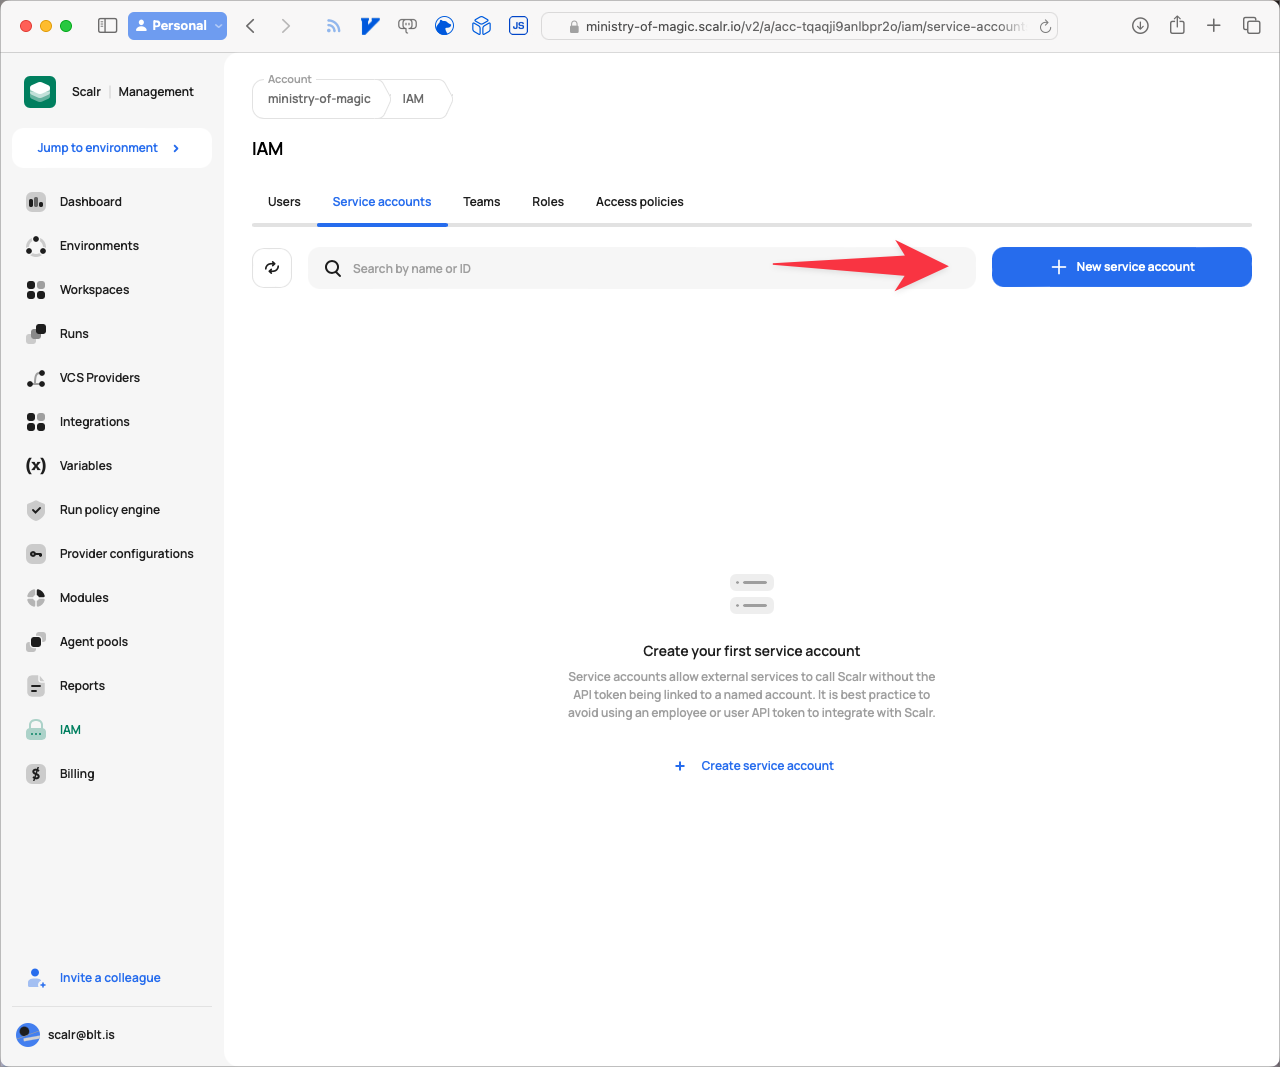
Creating a new service account
- Give the service account a meaningful Name, and then click on Grant access.
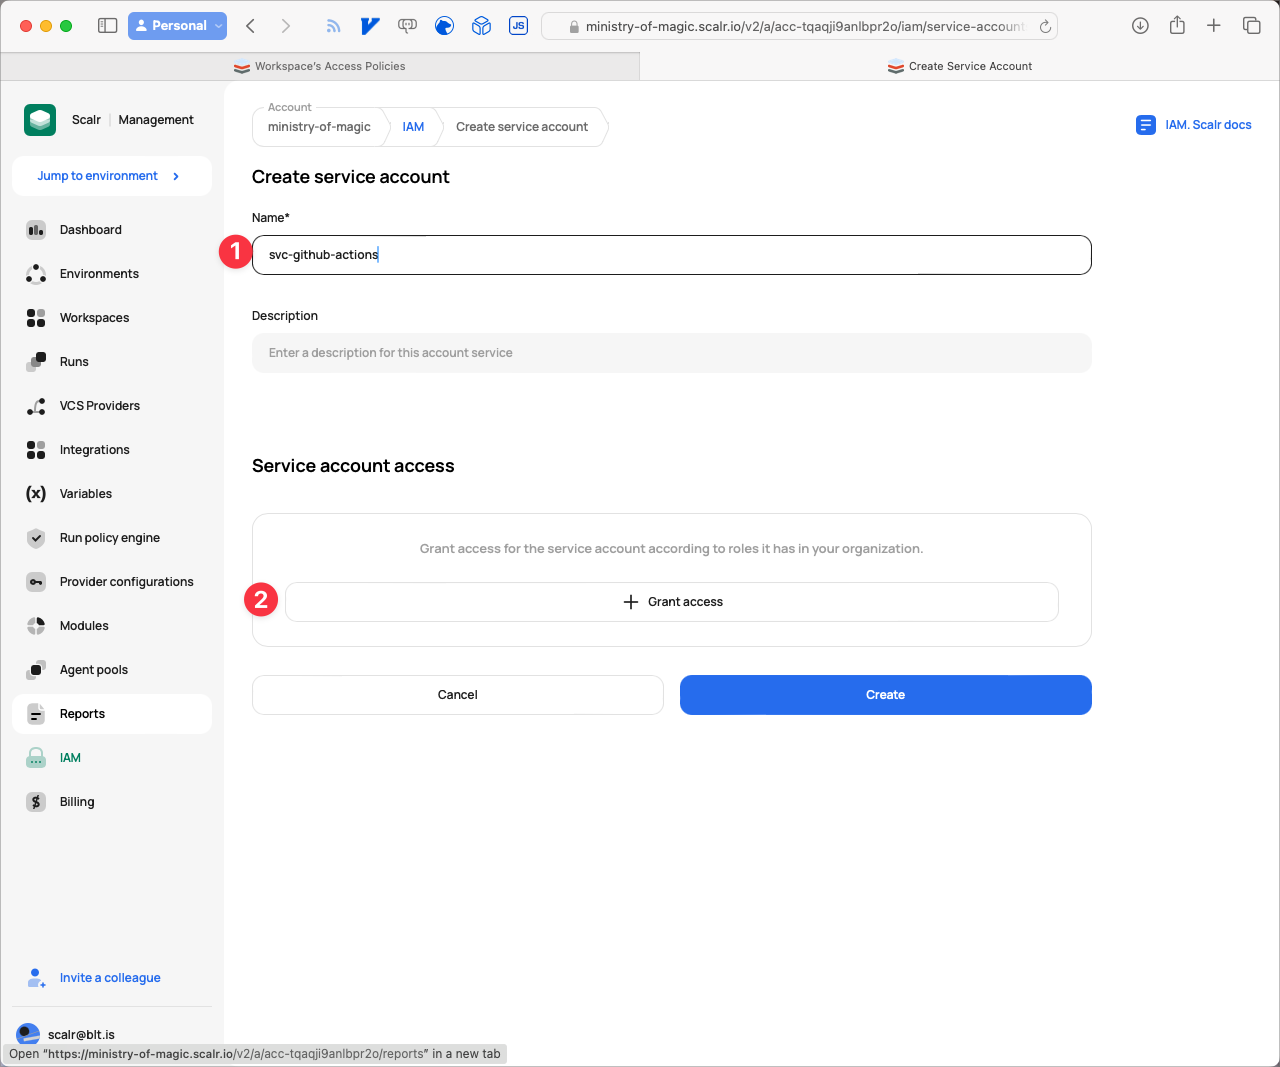
Granting access to the service account
- For this Service Account to work correctly for us we are going to need to provide it with access to three different areas within Scalr. Firstly under Roles we need to give access to
account-min-accesswhich provides the service account the ability to perform minimal operation on the account, ensure the Grant on is set to Account. Then click Assign.
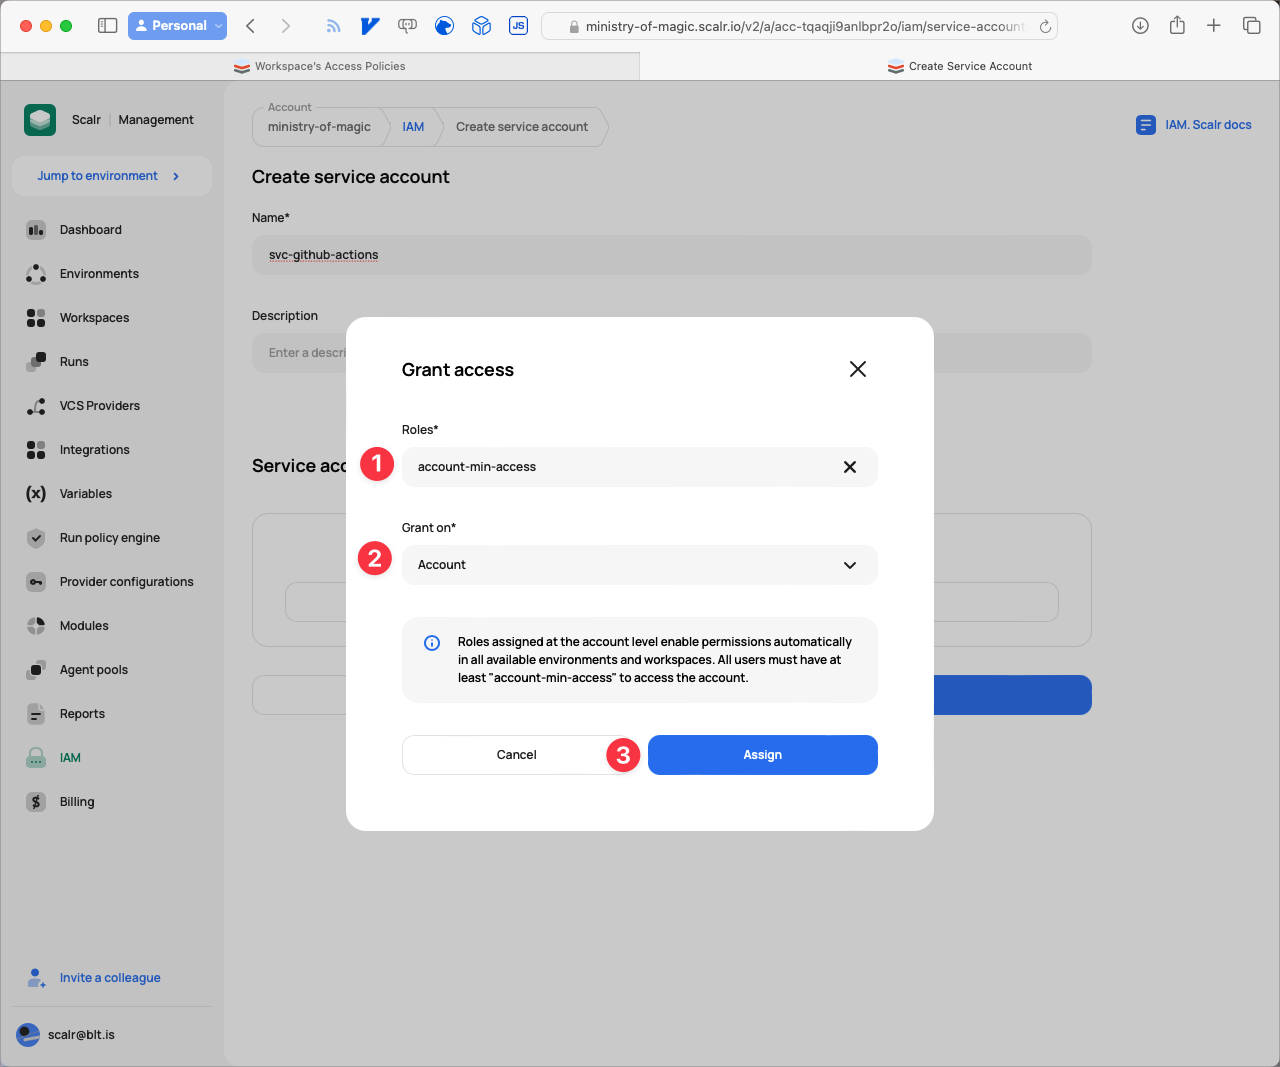
Assign account-min-access to the account
Next we need to provide access to the environment; select environment-min-access from the Roles dropdown, Environment from Grant on and finally select your environment name from the Environment dropdown. In our example that is Non-production. Finally click on Assign.
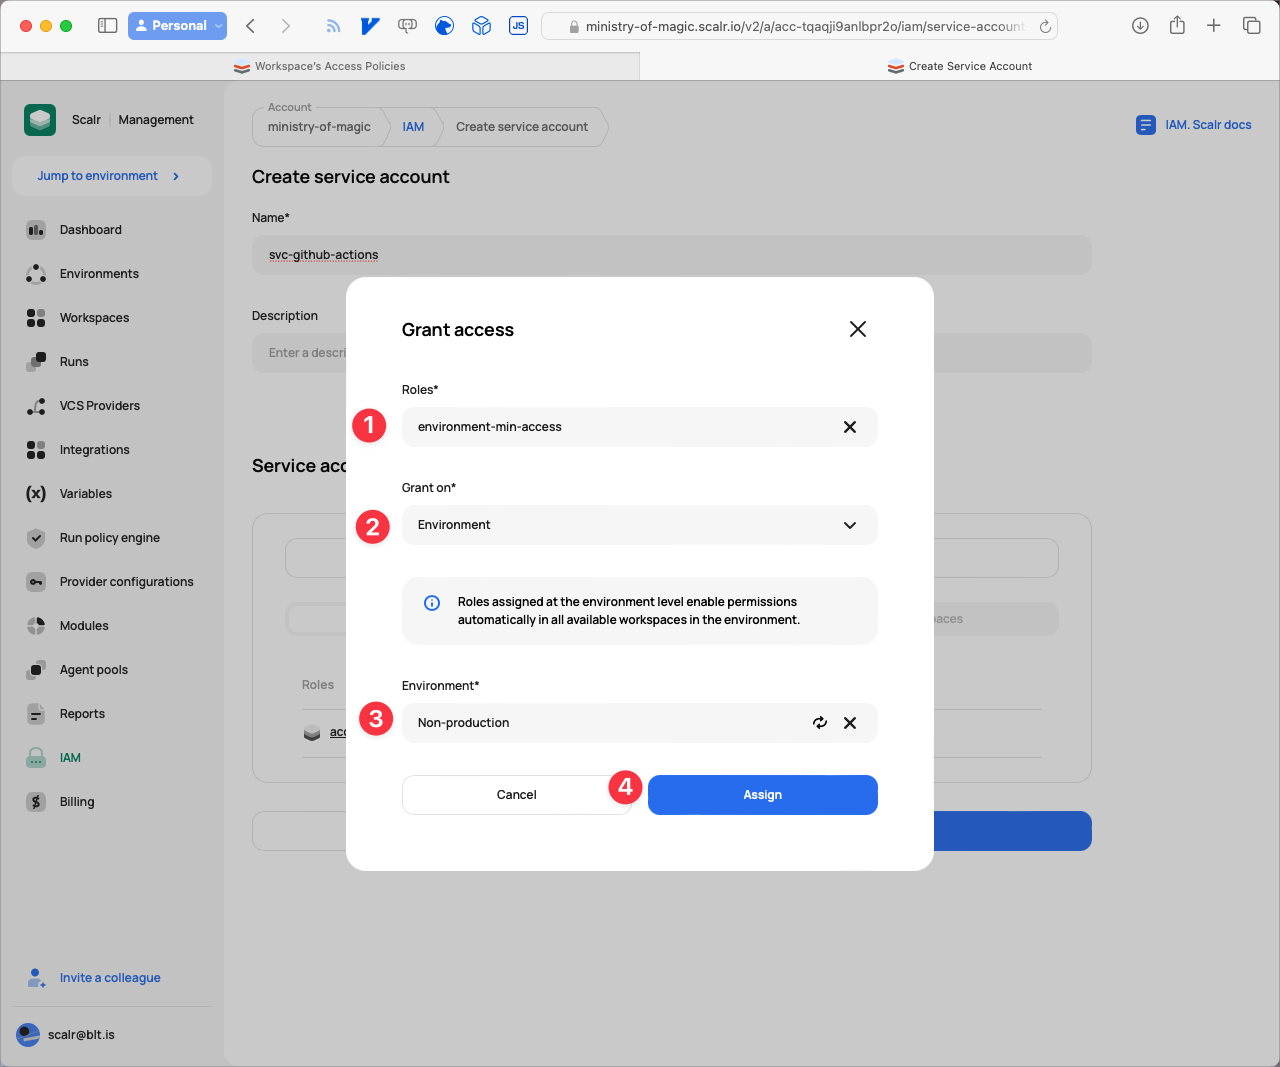
Assign environment-min-access to the environment
The final access we are going to be providing is to the workspace that we created, under Roles select admin, for Grant on select Workspace, Environment select your environment (e.g. Non-production), then select the workspace from the Workspace dropdown, finally click Assign.
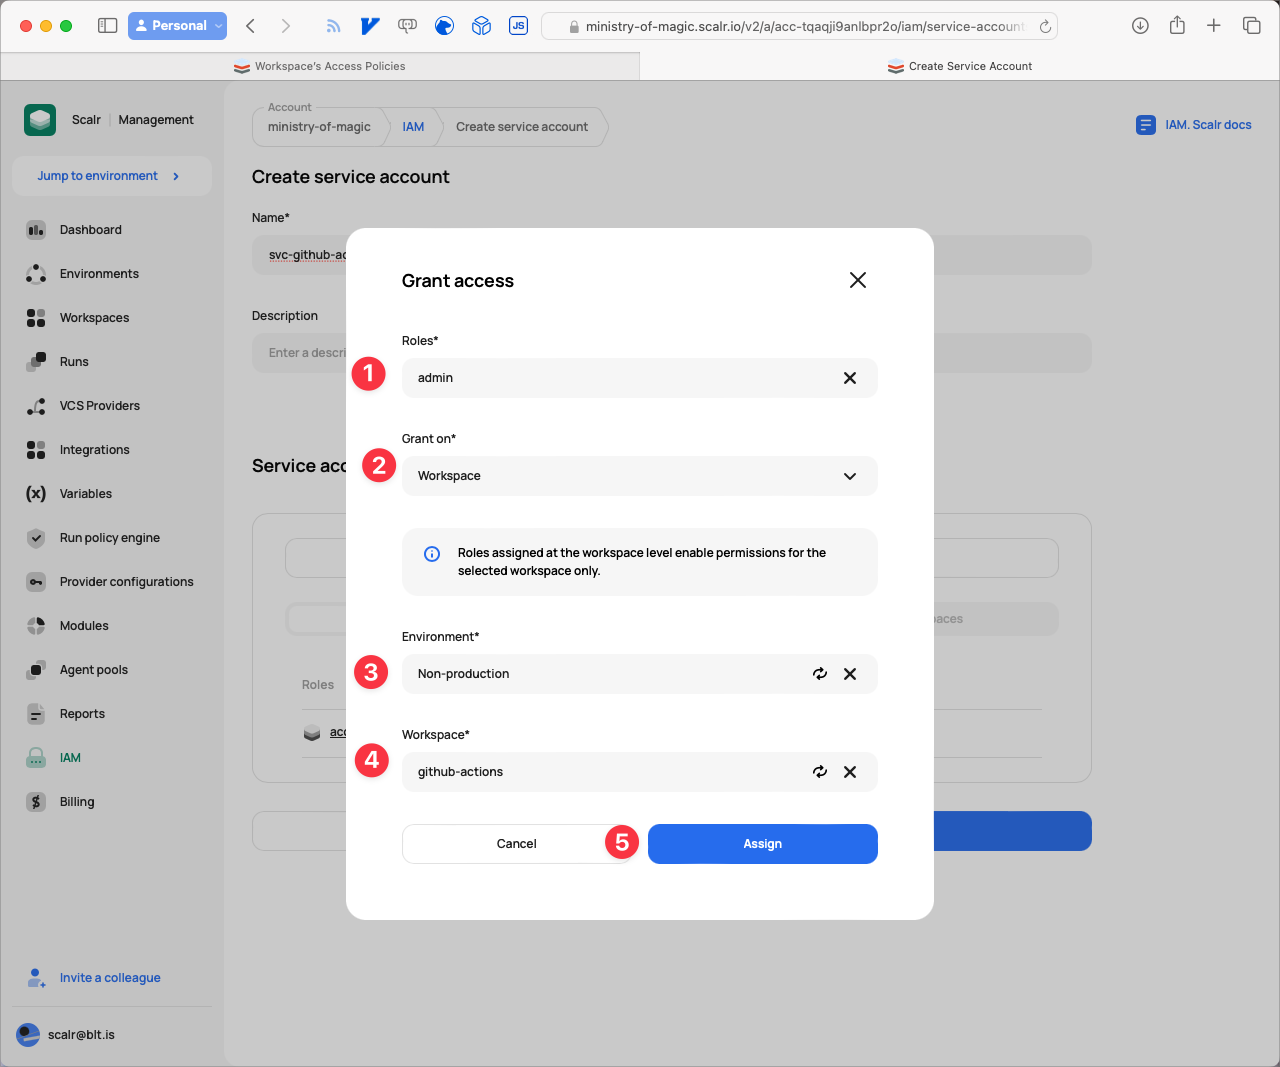
Assign admin to the workspace
- Now that the access is all setup for the Service Account we need to generate a token for use. Click the Generate token button.
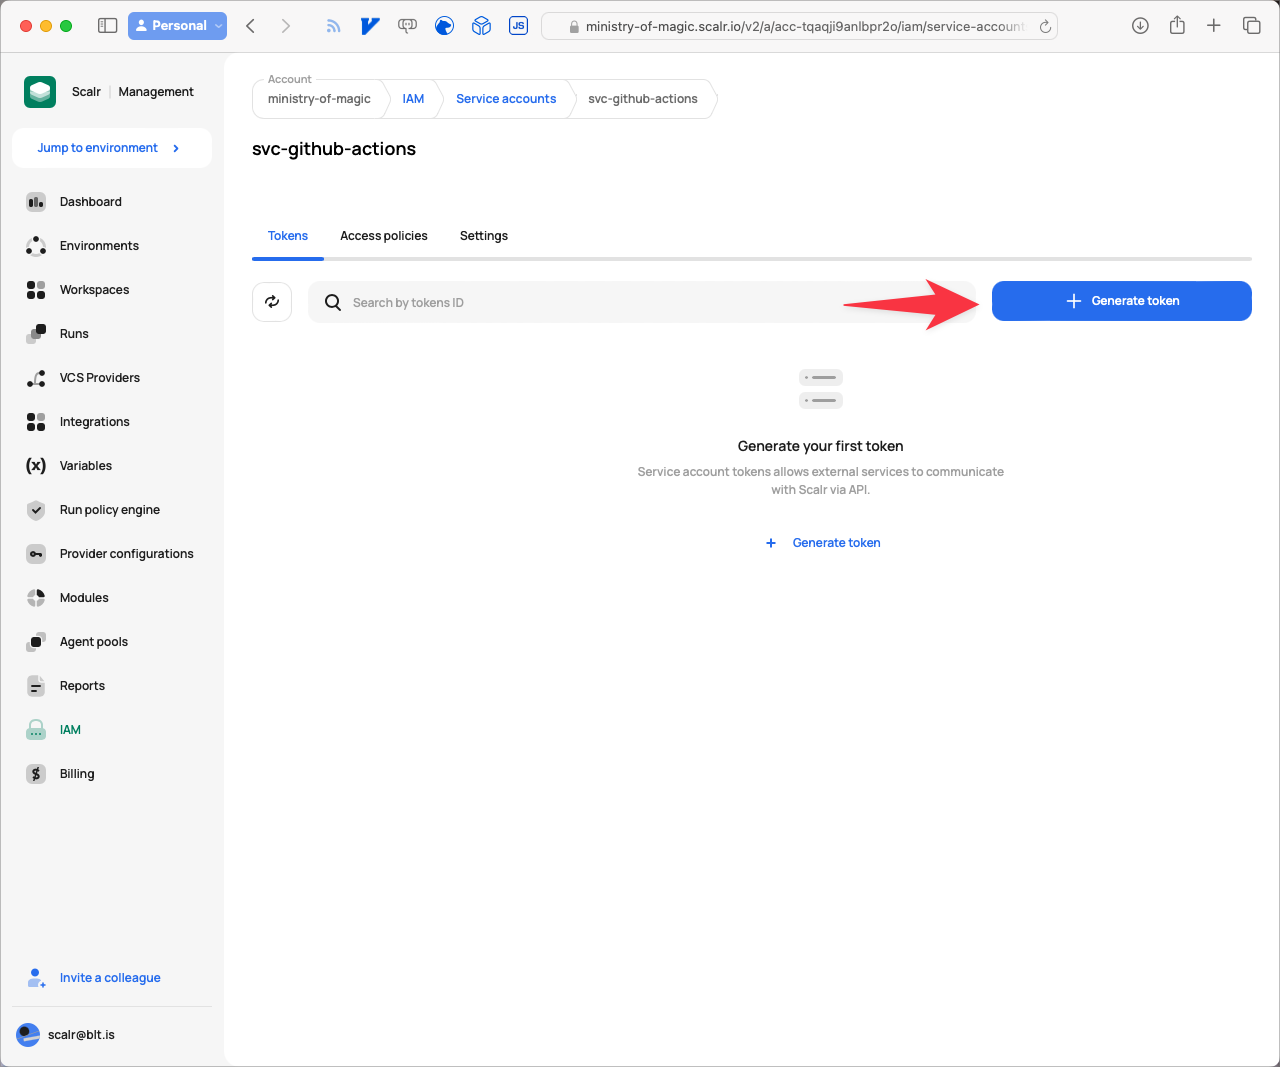
Generate a token for the service account
- Give the Token a Description that is meaningful should you require and click Copy and Save.
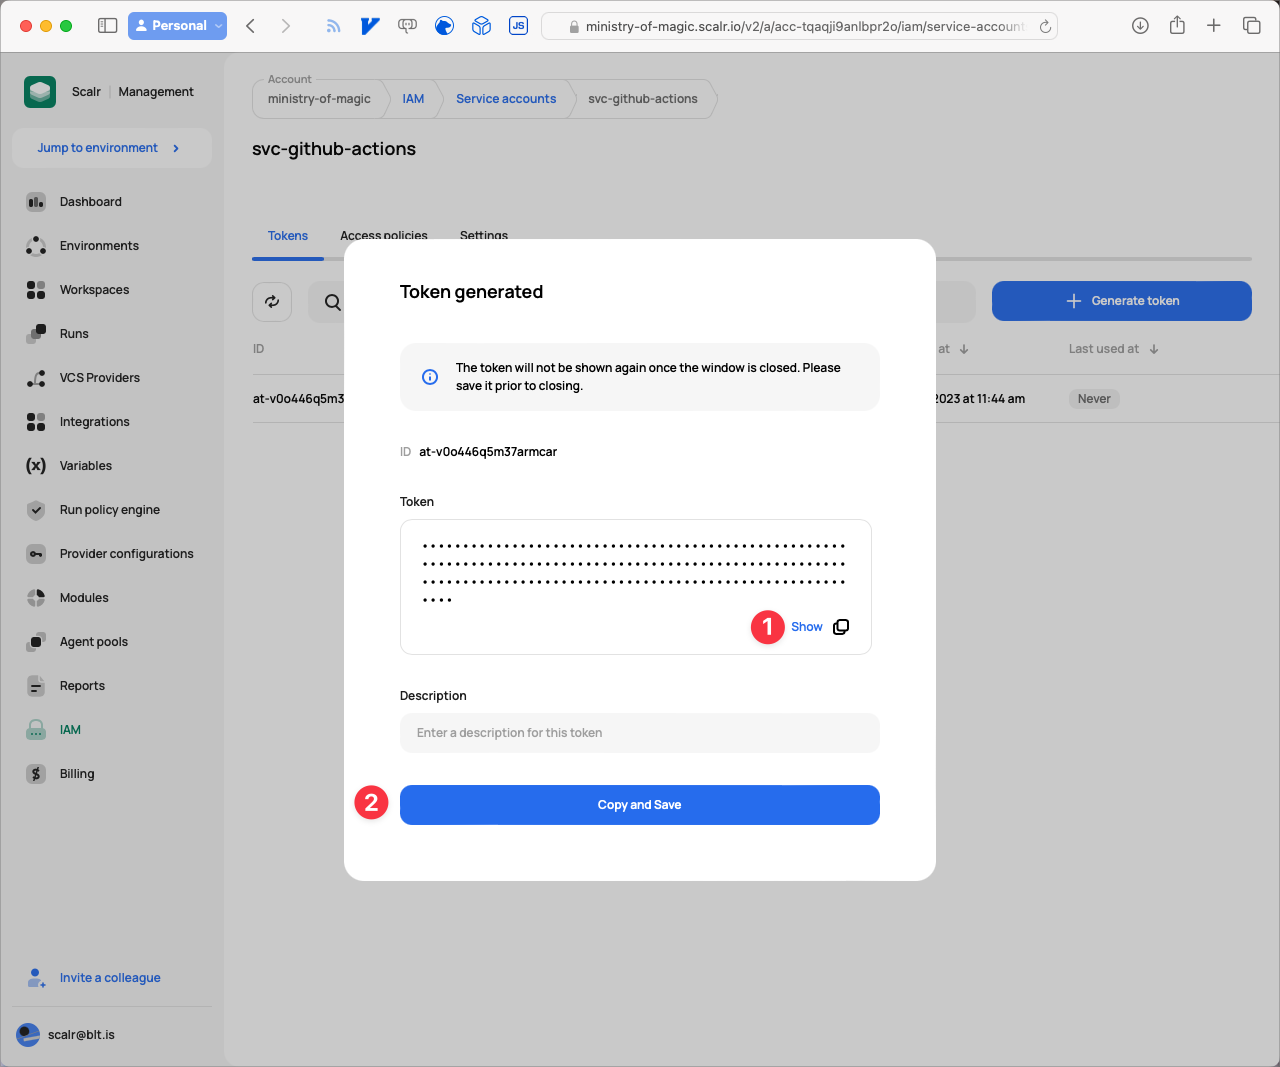
Copy and save the token
Now we have all of our pieces put together we will add them into GitHub in the next section!
Setting up Github
For our GitHub setup we are simply going to be adding in the Token we just generated within Scalr, this will allow GitHub Actions to perform state storage operations on our workspace.
- From your repository root click on Settings.

Navigate to setting in Github
- Click the disclosure on the Secrets and variables menu item.
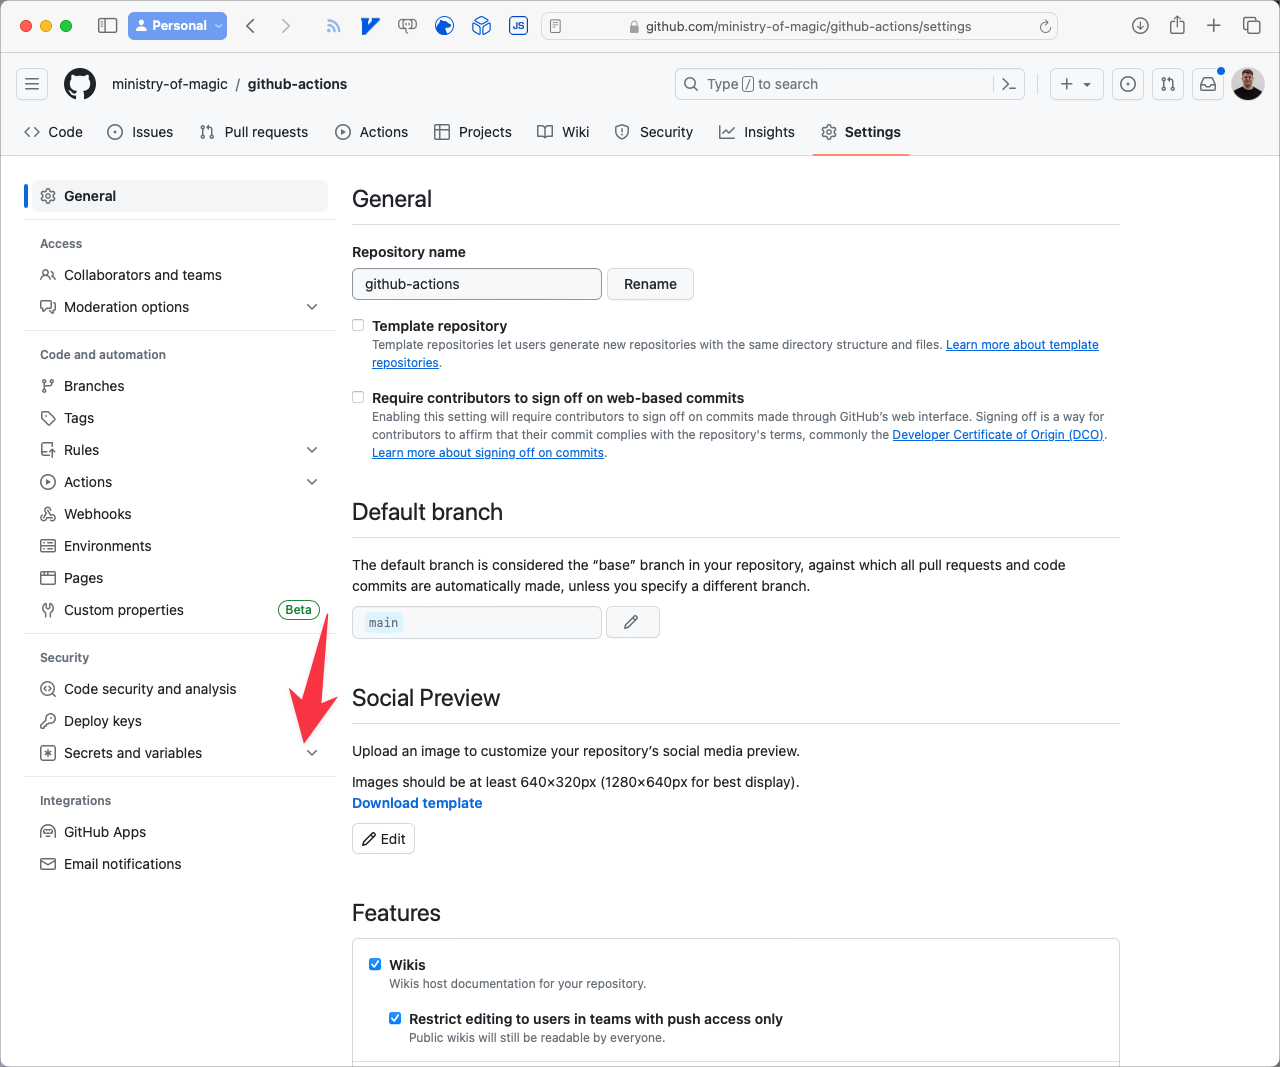
Navigate to Secrets & Variables
- Click Actions.
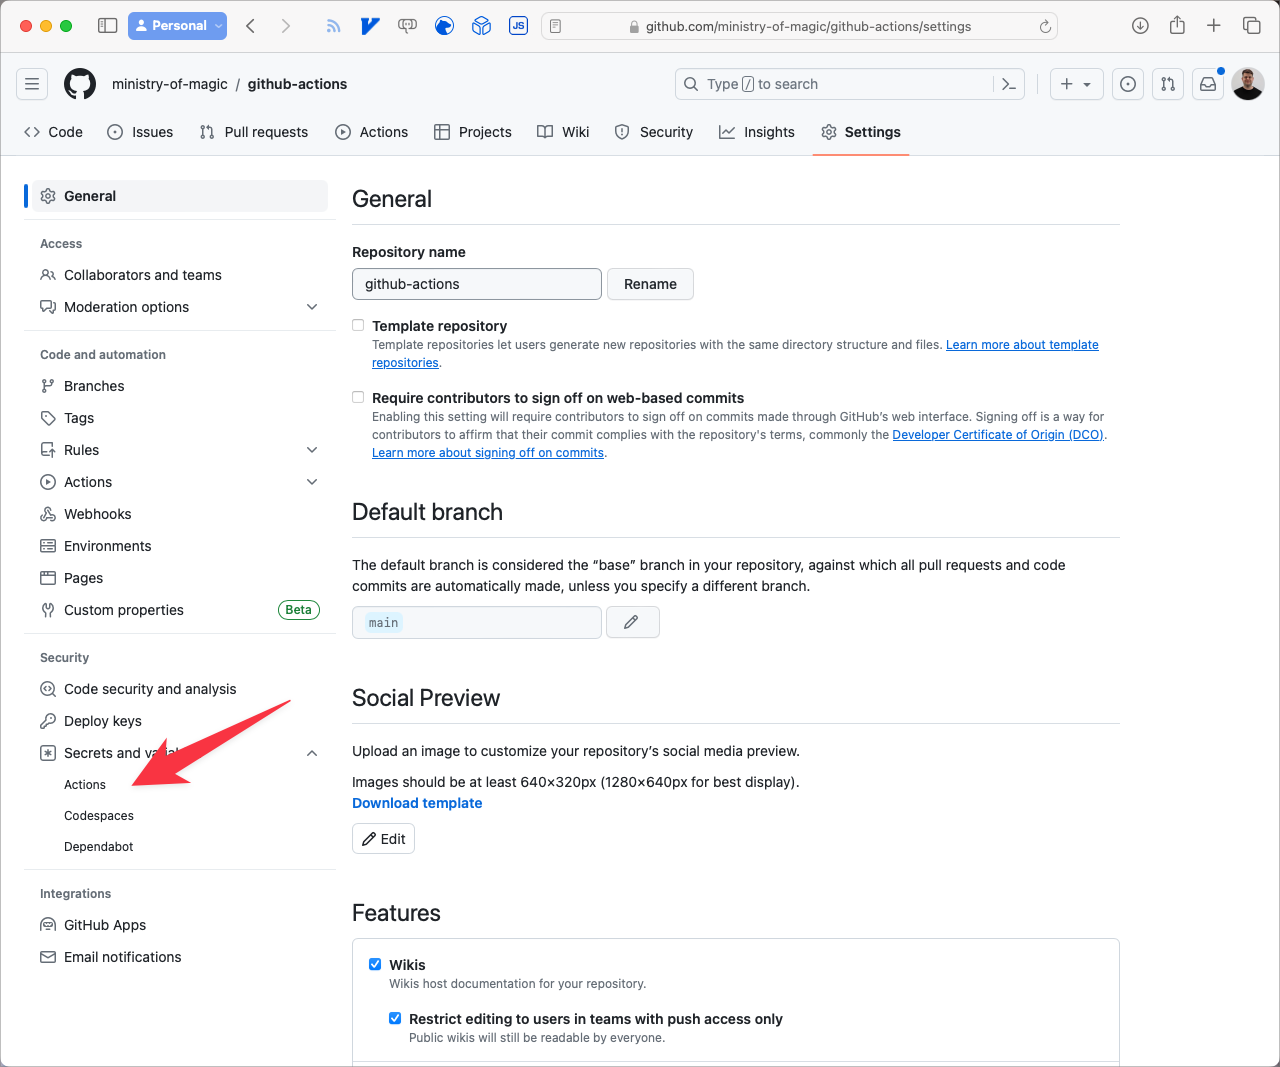
Navigate to Actions
- Click on New repository secret.
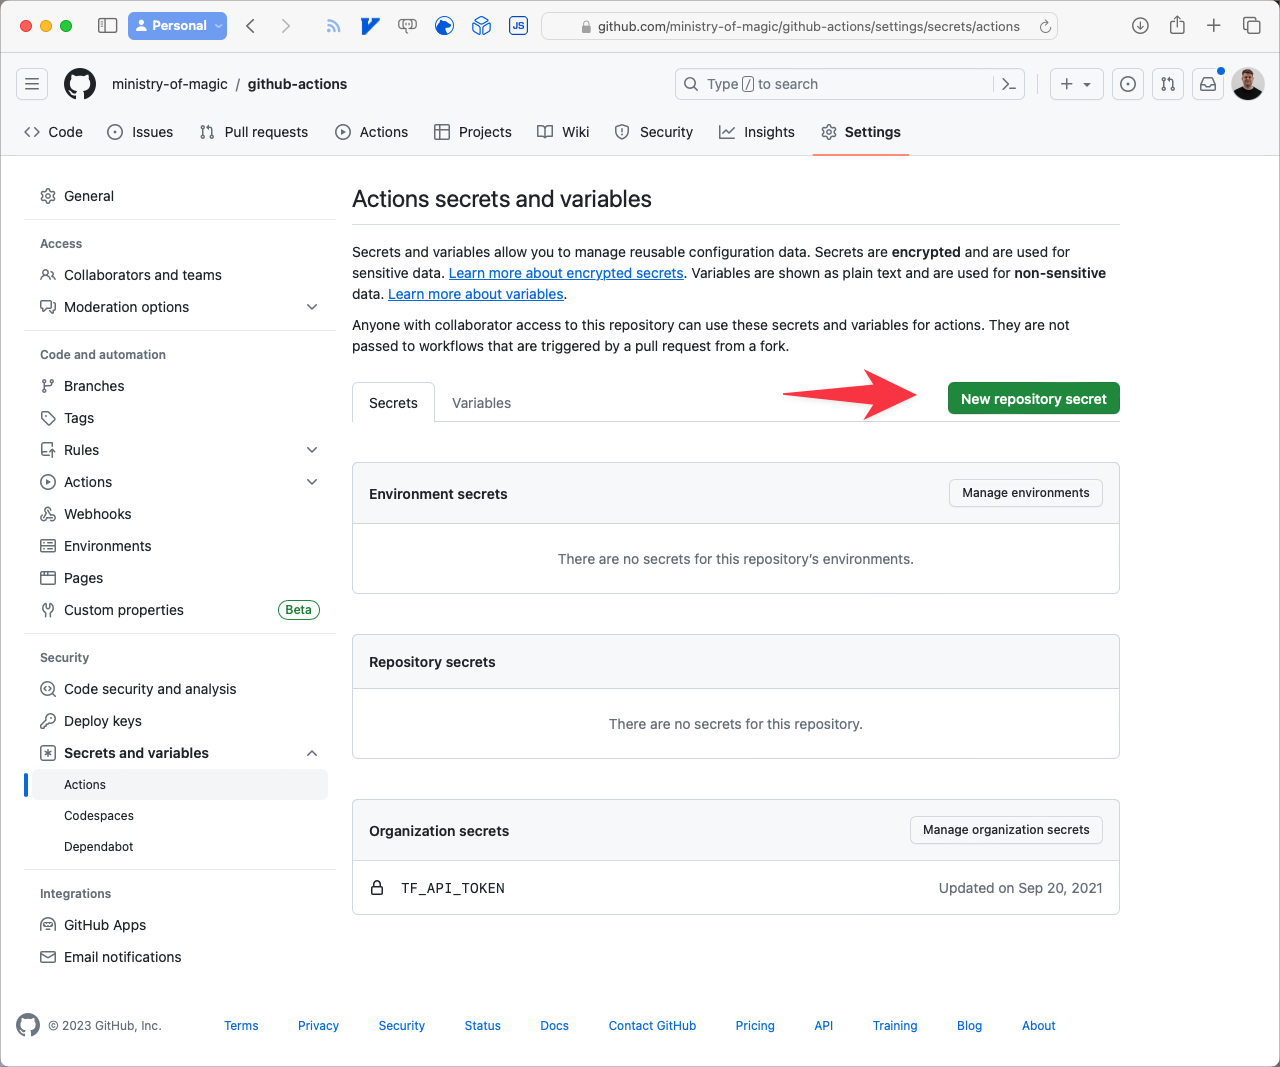
New Repository Secret
For the Name field we need to set that as SCALR_TOKEN, the Secret should be set to whatever Token value you copied from Scalr, finally click Add secret.
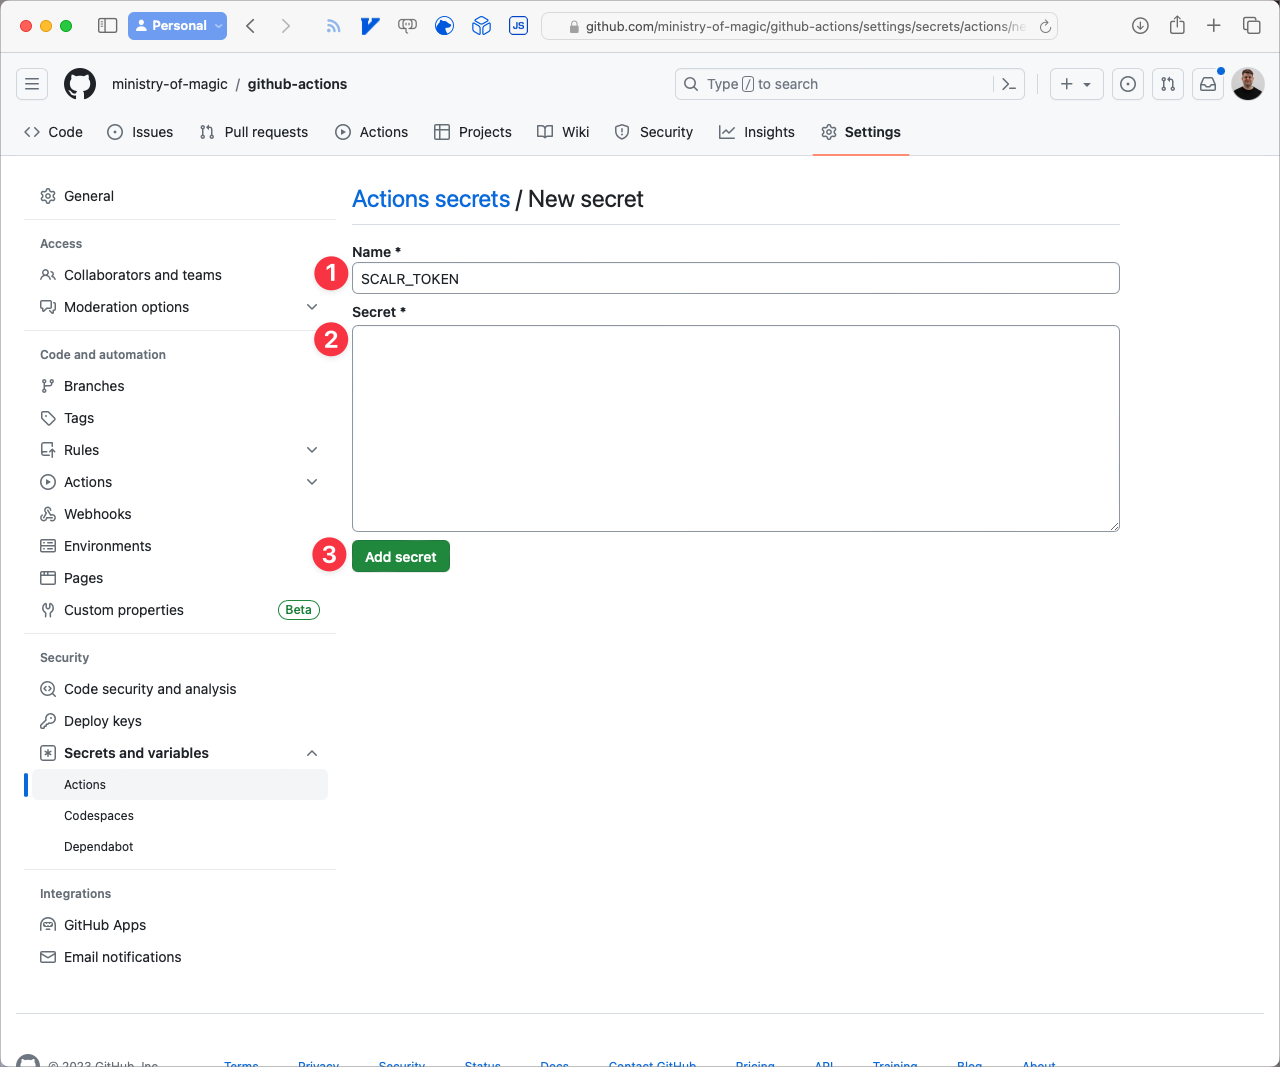
Add a new secret
Terraform & GitHub Actions Code
Our environment is now completely setup and ready to accept our Terraform code as well as the definition of our GitHub Actions workflow. Firstly let's take a quick look at the Terraform code example, it is just going to be provisioning a scratch resource and outputting its value for us. Let's break up the code a little bit.
Firstly we need to ensure that our version of Terraform is set to less than v1.6, in this instance we will use v1.5.6.
terraform {
  required_version = "1.5.6"

  # ...
}
Next we need to instruct Terraform to use Scalr as our backend, this has three properties that are required to be set:
hostname: the Scalr URL to your Organization.organization: the Environment ID from your Scalr Organisation.name: the name of the Workspace that the code is going to be deployed into.
If you're interested in learning about how you can set some of these more dynamically I would recommend reading: How to set Terraform backend configuration dynamically
terraform {
  # ...

  backend "remote" {
    hostname = "ministry-of-magic.scalr.io"
    organization = "env-tqaqjimtnmmgiv0"

    workspaces {
      name = "github-actions"
    }
  }

  # ...
}
From the Scalr Workspace dashboard page you can get the Workspace configuration by clicking on Remote backend configuration.
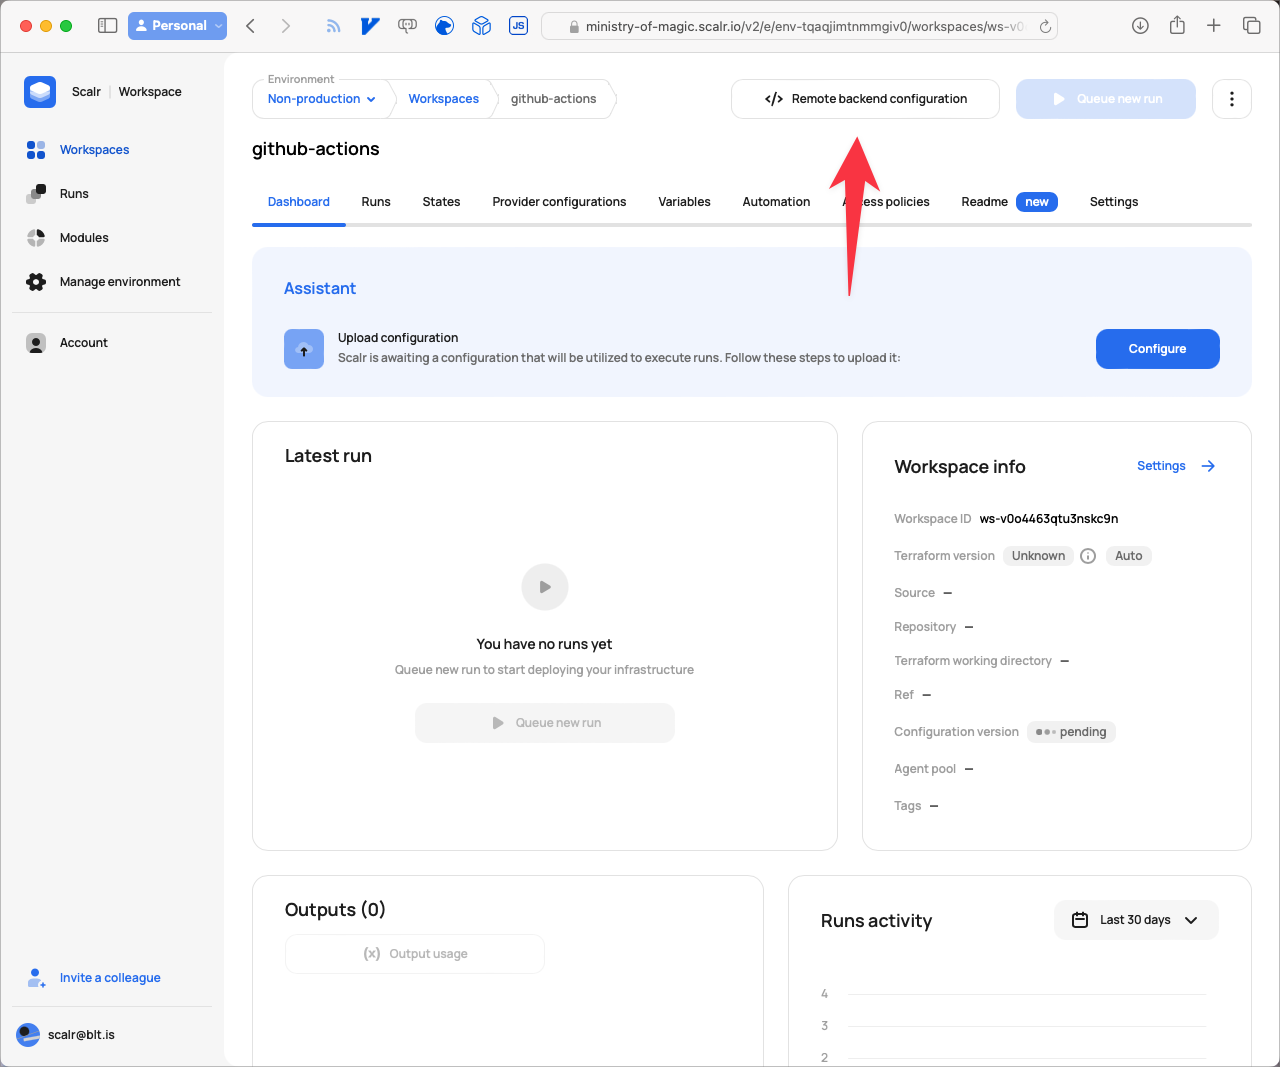
Navigate to the remote backend configuration
This will show the following modal with the details that can be copied and pasted into your editor:
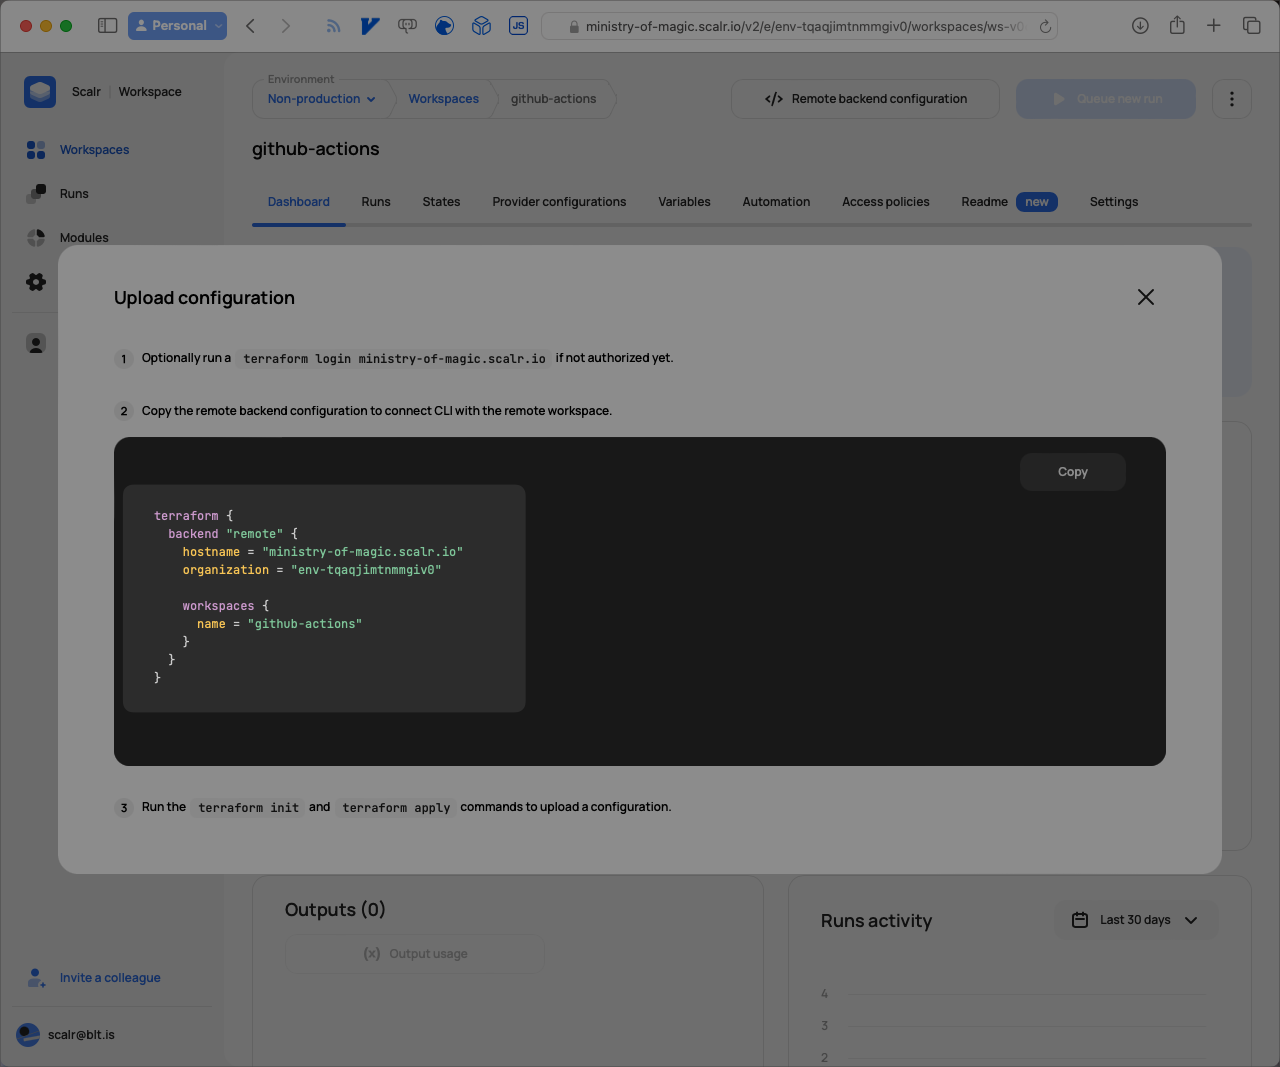
Configuration details to copy
The final element required within our terraform block is the required_providers, this instructs Terraform where to download the provider from and what version constraints to be applied if defined.
terraform {
  # ...

  required_providers {
    scratch = {
      source = "BrendanThompson/scratch"
    }
  }
}
With all of that in place now when we define the following it will store its state into the remote backend we defined earlier.
resource "scratch_string" "this" {
  in = "Hello, GitHub Actions"
}

output "github_actions_string" {
  value = scratch_string.this.in
}
As I said, a very simple Terraform root module definition, we are merely going to be printing a message to the output. Next we will step into the GitHub Actions (GHA) workflow file, this file MUST exist within the .github/workflows directory in your repository.
name: Scalr
on:
  push:
    branches:
      - main
jobs:
  deploy:
    name: Deploy
    runs-on: ubuntu-latest
    steps:
    - name: Checkout code
      uses: actions/checkout@v2
    - uses: Scalr/scalr-action@v1
      with:
        scalr_hostname: 'ministry-of-magic.scalr.io'
        scalr_token: ${{ secrets.SCALR_TOKEN }}
        terraform_output: true
        terraform_version: '1.5.6'

    - run: terraform init

    - id: plan
      run: terraform plan

    - run: echo "${{ steps.plan.outputs.stdout }}"
    - run: echo "${{ steps.plan.outputs.stderr }}"
    - run: echo "${{ steps.plan.outputs.exitcode }}"

    - id: apply
      run: terraform apply -auto-approve

    - run: echo ${{ steps.apply.outputs.server_ip }}
This defines us a very basic GHA workflow wherein any push to the main branch triggers an execution of the workflow. Firstly we checkout the Terraform code from the repository using actions/checkout@v2 then we setup the Scalr environment on the runner with the Scalr/scalr-action@v1 action, this is where we provide the Scalr Organisation and Token as well as optionally a Terraform version. If the Terraform version is not provided then Scalr will attempt to work it out for itself.
The next steps should look fairly familiar:
terraform init: initialises our code, pulls providers and modules as well as setting up connectivity to the backend.terraform plan: plan our version of the code against what exists in production.terraform apply: applies any changes to the environment.
All the echo steps are doing is providing useful information back to us. You can read more about the action on the Scalr Github Action page.
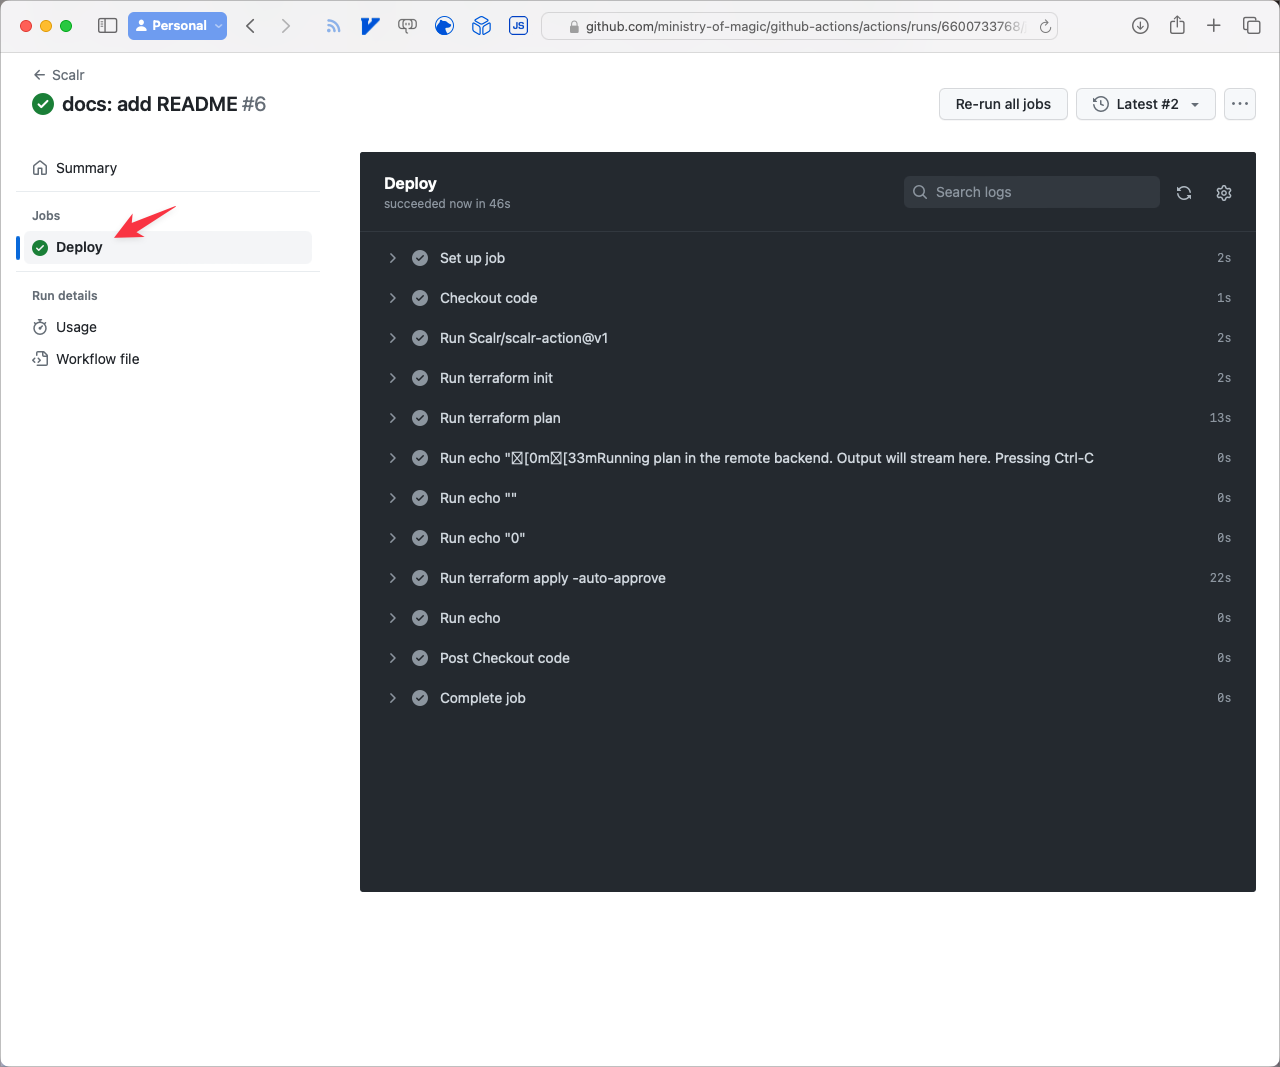
The GitHub Actions Run
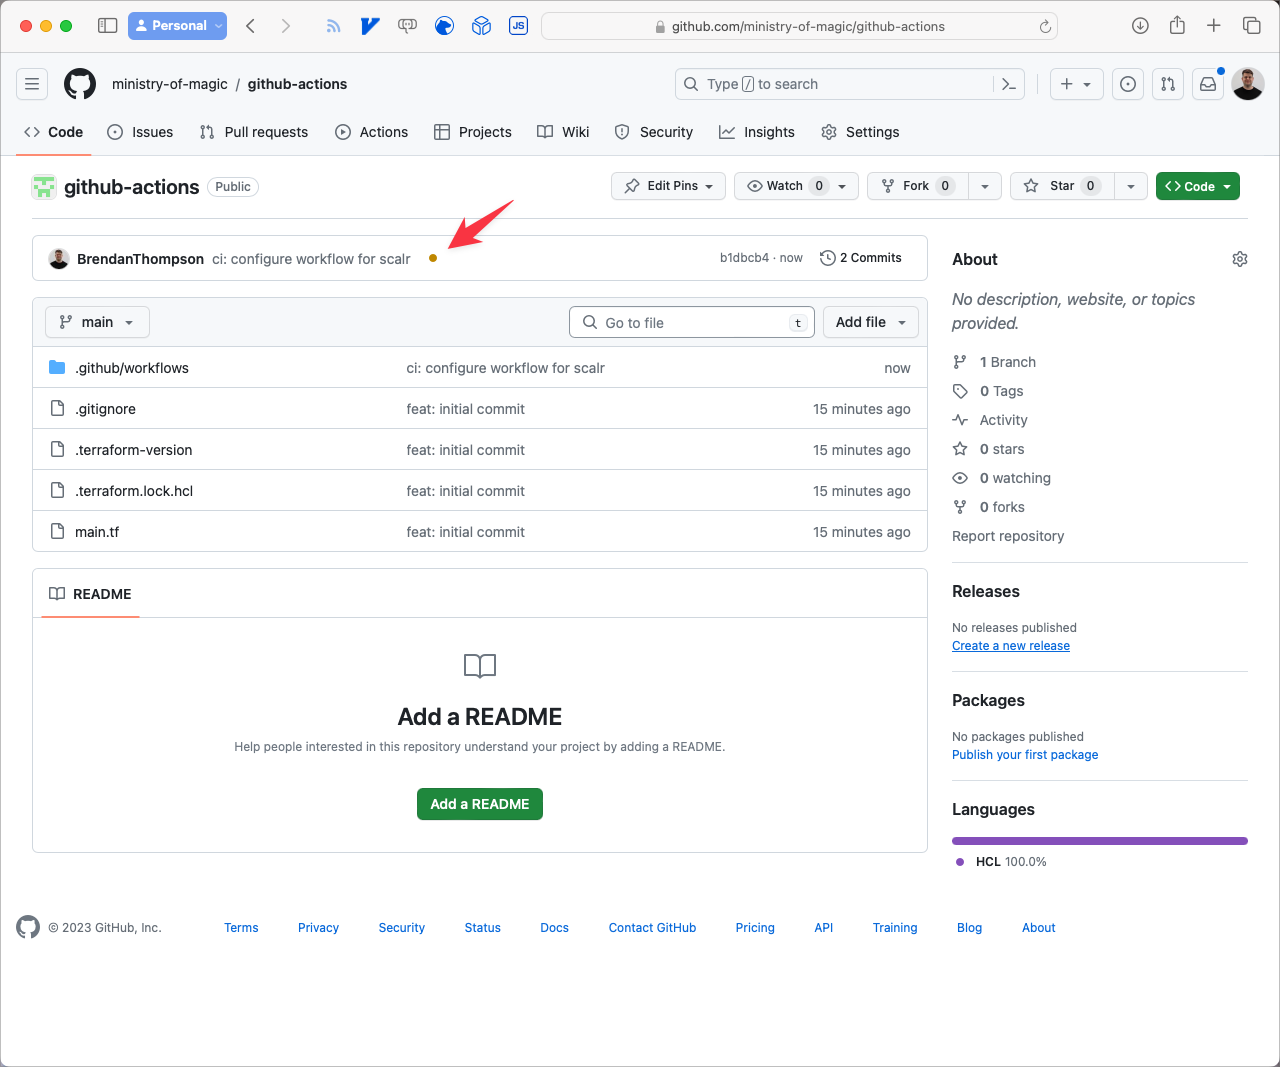
Now that everything is setup and linked together when we push a change into GitHub a run is triggered. From the Repository root after a change has been pushed you can click on the little orange dot next to the commit.
This brings up a small modal, click on Details.
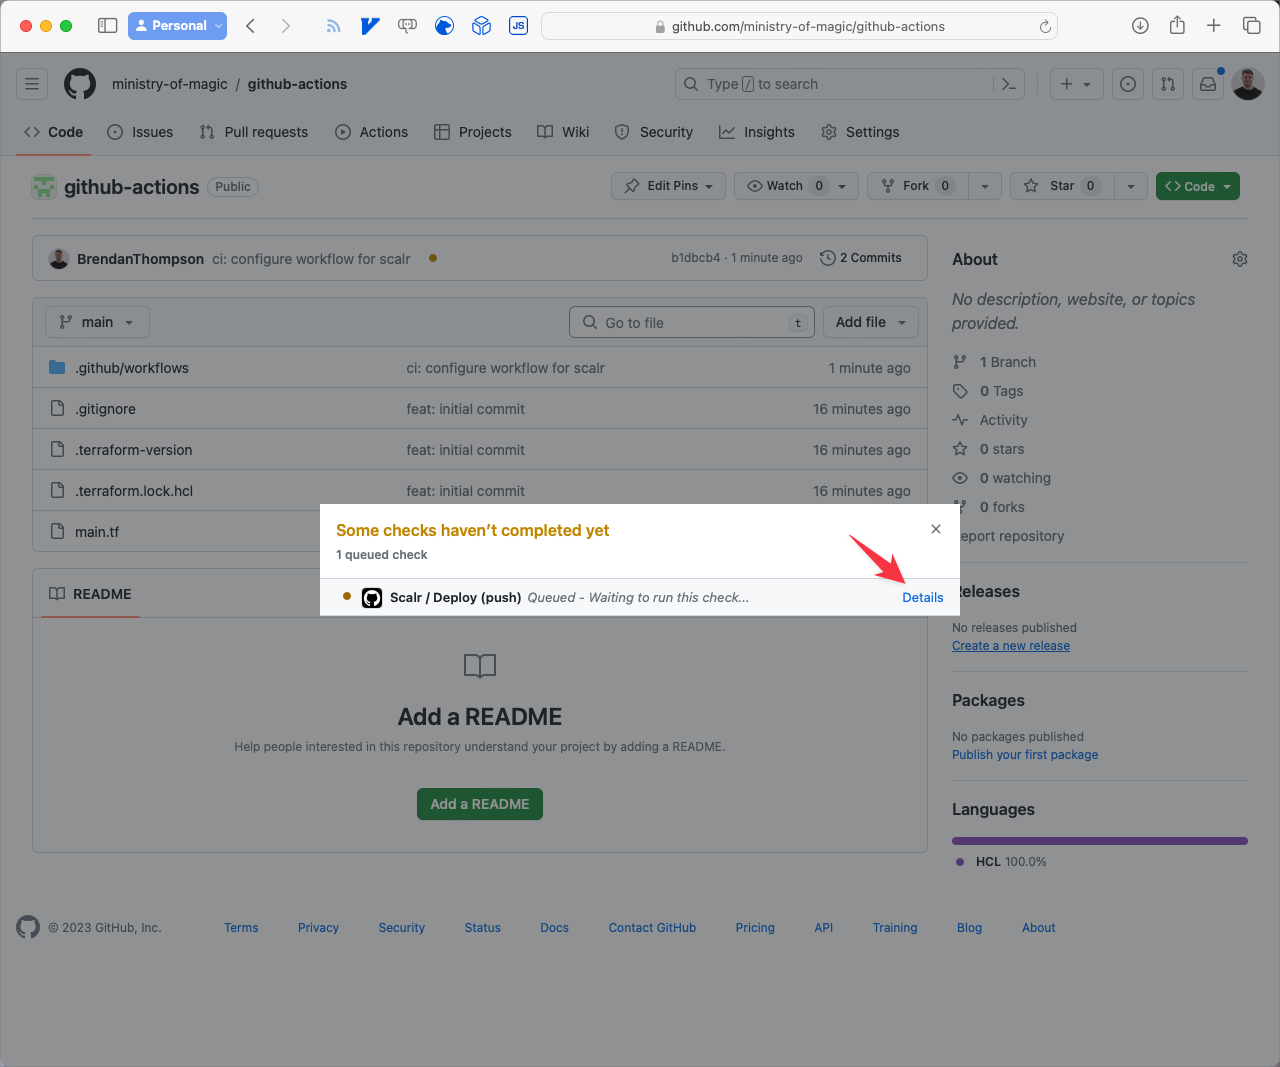
From here you can see a full summary of what is going on:
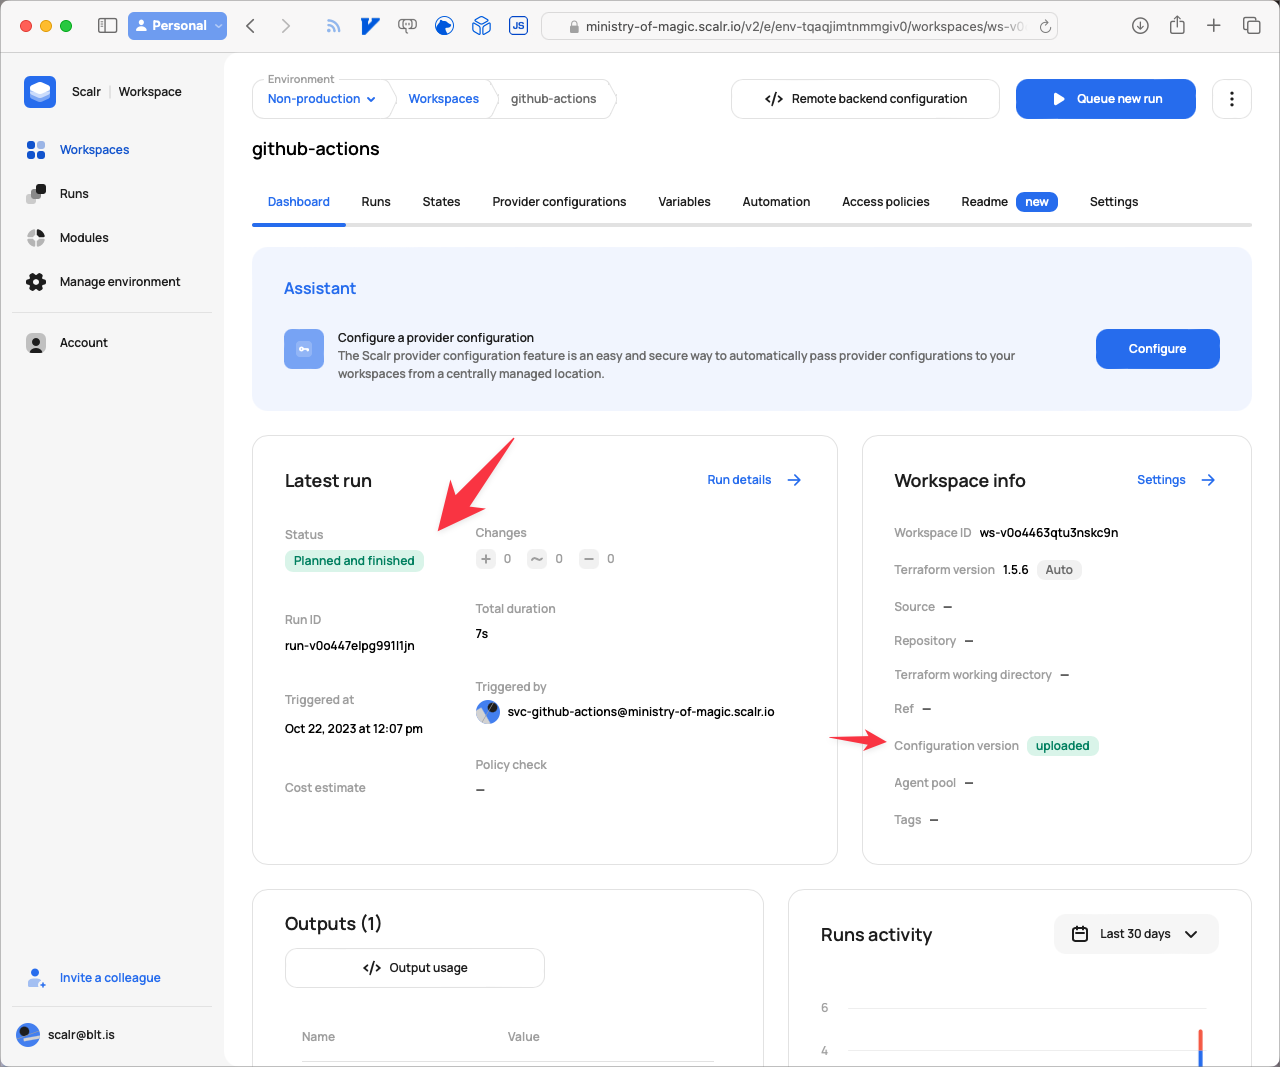
Once the Job has finished you can go back to Scalr to see what's happened:
Closing Out
So today we have looked at how easy it is to setup a GitHub repository hosting Terraform code with Scalr as the backend state storage facility using GitHub Actions as the orchestrator. If you're just starting out with Terraform in your organization and are looking for a free, highly-available and solid state storage solution then this is one of the most solid ways to go. As you will soon learn the more you delve into Terraform state is both a blessing and a curse, having it stored somewhere that is extremely solid is absolutely critically important!!

CI/CD and GitOps for Terraform & OpenTofu
Comprehensive guide to building robust CI/CD pipelines and implementing GitOps workflows for Terraform and OpenTofu infrastructure automation.